3 min read
Announcing DAY2 Cloud Governance: Avoid Cloud Bill Shocks with Preventive Guardrails
 Varsha Mallya
:
Dec 9, 2020 11:42:00 AM
Avoid cloud bill shocks and enforce cost, compliance, security, and governance guardrails with DAY2 Cloud Governance. In this blog, Varsha Mallya – Technical Product Manager at MontyCloud outlines how you can enable your users to deploy governed cloud environments while also responding to their unique configuration needs, through well-architected Infrastructure as Code templates.
– Sabrinath S. Rao
CloudOps and IT teams can enable their users to deploy compliant cloud accounts and application infrastructure with well-architected Infrastructure as Code templates available in the MontyCloud DAY2 blueprints library (DAY2 Blueprints). Cloud environments are dynamic and often times departments and users configure similar resources differently. CloudOps and IT teams have to create multiple versions of the same blueprints, with variants based on each department or applications’ needs.
Now with DAY2 Cloud Governance, CloudOps and IT teams can create varying configurations and publish them to specific users and/or departments. Depending on your business needs, you can restrict or give your users flexibility in configuration parameters. For example, you can allow users to make choices from approved Amazon EC2 images and instance types, and also lock down parameters such as VPC boundaries, Subnets etc. Finally, you can also immediately assess the minimum cost of running the blueprint configuration. The customized preventive guardrails help CloudOps and IT teams enforce governance guardrails, while also enabling their users to deploy cloud infrastructure on-demand.
Creating your own configuration
Let’s walk through an example scenario. In our example, the Development and Bizops teams need to regularly deploy Apache web server nodes to support internal app development. The CloudOps Admin wants to ensure that, when users deploy their infrastructure, they stay within their governance and guardrails such as their approved AWS Account, AWS Region, VPC and deploy only their approved resources such as instance type and storage class.
First, we log into DAY2 and click Details for the Apache Web Server blueprint. Then navigate to the Launch Configurations tab. All DAY2 blueprints come equipped with a ‘default’ configuration. We can optionally disable the default configuration once a desired configuration is created.
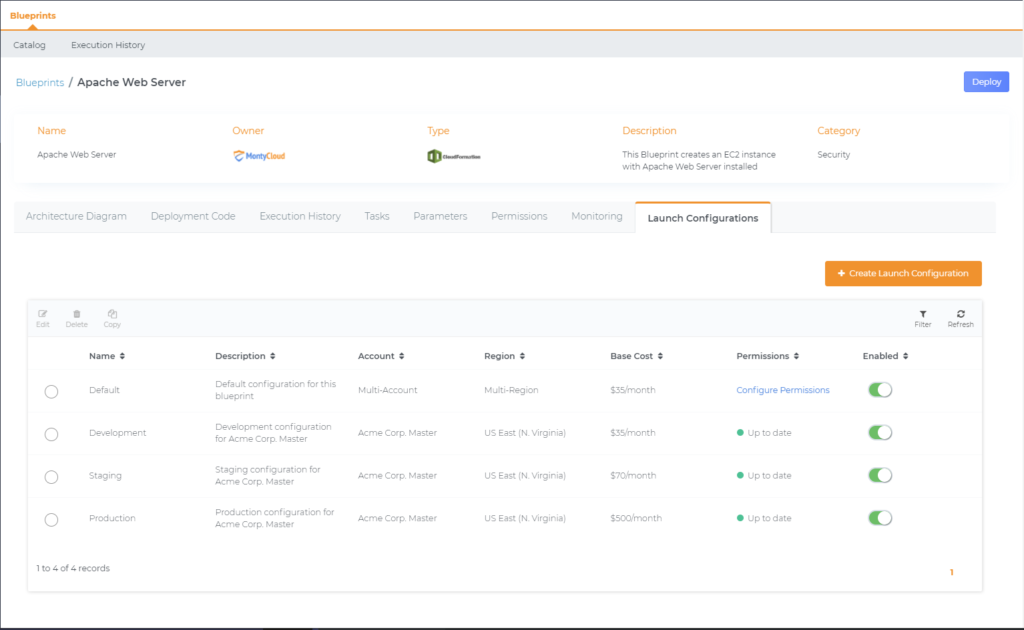
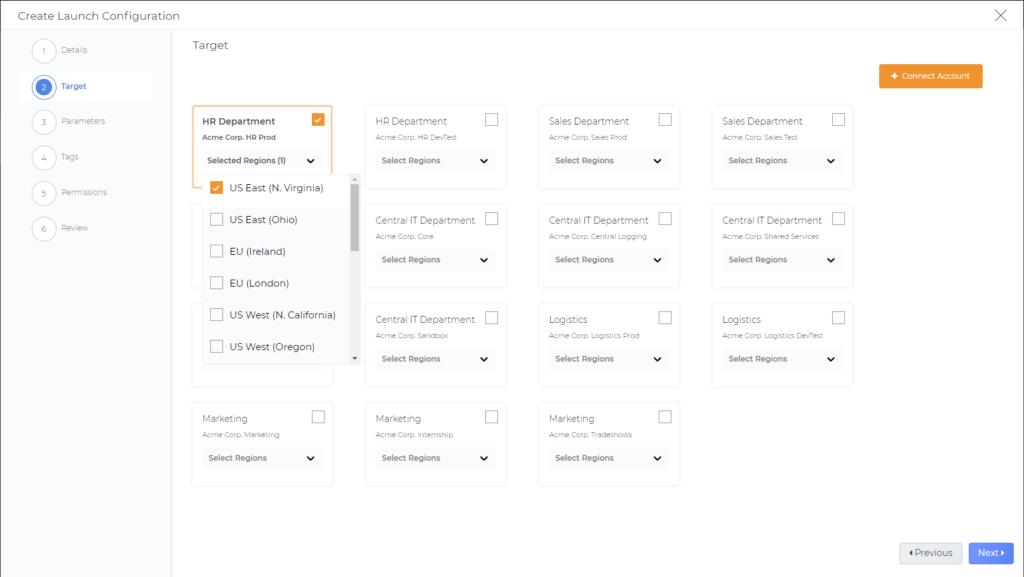
Next we select the “+ Create Launch Configuration” button, which opens the deployment wizard. Now, its time to name our new configuration and set the target departments and regions our users can deploy this blueprint. We can also align AWS Accounts to departments, so we don’t need to select or remember which individual accounts belong to the business units.
Now we need to define our parameters such as resource types, application name, and key/value pairs for tagging. We can change the defaults and also enforce configurations with pre-determined values. In this example, let us pre-set the Application Name and Environment.
Next, we can decide which parameters will be visible to and/or editable by users. We can also selectively allow users to edit parameters within our guardrails. For example, we can allow users to choose from a range of EC2 Volume Sizes. In this example, let us hide Application name and Environment label.
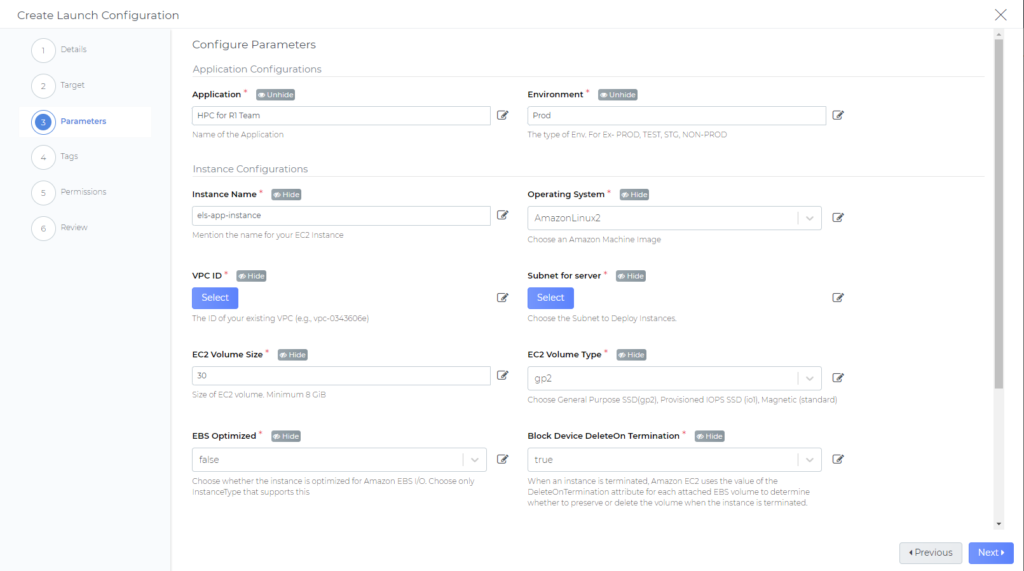
We can go further and change any setting within the blueprint. However, note that you can pre-define and lock network settings only be if the department and region scope is locked to a single AWS account and region. This is because networking settings are unique between regions and accounts. All other settings within a configuration do not have this restriction.
After the required settings have been defined, the next two steps in the wizard enables us to automatically tag our deployed resources. After we define the key/value pair parameters, each time this blueprint configuration is deployed, all resources are automatically tagged. Auto tagging ensures resources are immediately inventoried, classified and are ready for continuous monitoring as well as autonomous compliance and security enforcement.
DAY2 also automatically checks and verifies for the required deployment permissions.
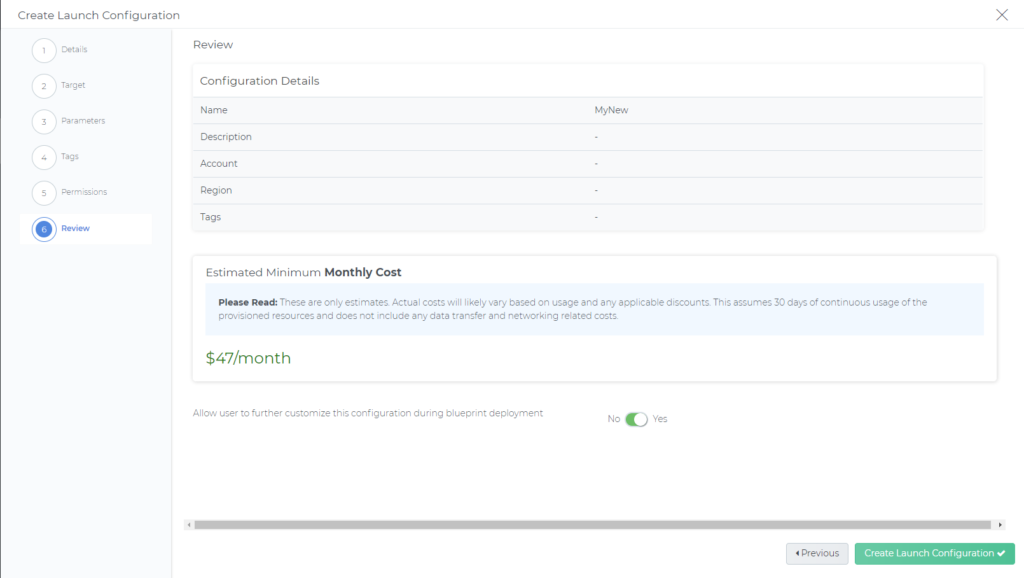
In the review page, DAY2 automatically displays the the minimum cost to operate the configuration that we just created above. The value displayed is for 1 month of usage as generated by the AWS cost calculator. (DAY2 assumes 100% operation, or 720 hours, but excludes any network charges). This helps decisions makers verify if the cost is within the budget scope for the user or department.
Finally, all settings can be quickly reviewed before saving and publishing this configuration.
What do the users see?
Now that we have saved our new configuration, let’s look at what our users see when they try to deploy a blueprint with a launch configuration.
When Department Admins and Department Users click Deploy, they are presented only with the blueprint configurations scoped to their department. Parameters we marked as viewable are listed in the Configuration Parameters table, and any other configurations are hidden from view.
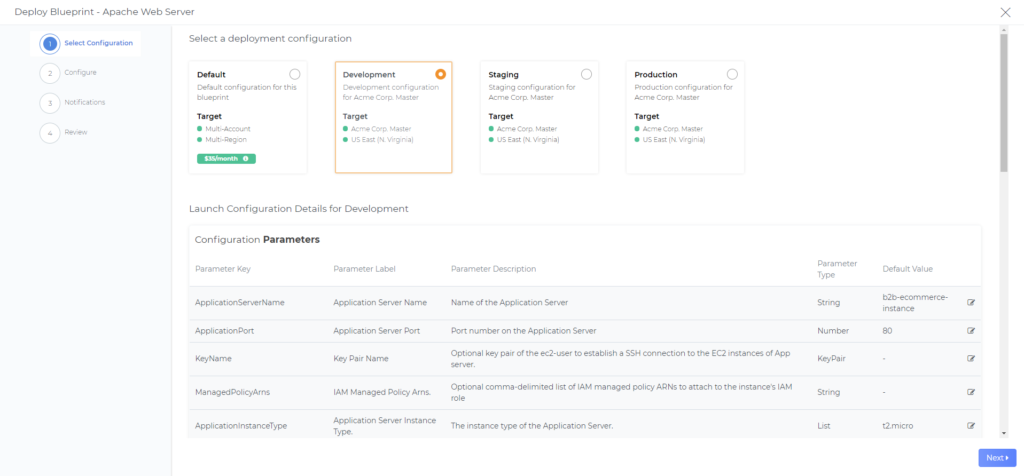
DAY2 Cloud Governance helps you avoid cloud infrastructure and governance bill shocks. You can now enforce preventive guardrails for teams deploying cloud resources and applications across your organization, in just a few clicks!
How can I start using this today?
DAY2 Cloud Governance is available in MontyCloud’s DAY2 platform today, and to learn more about this feature and about MontyCloud’s intelligent Cloud Management Platform, you can request a demo here.


